Before You Light: Getting to Know Your Stove
Every wood burner has a set of air controls that govern how the fire behaves. Before you strike a match, it is worth understanding what each one does. While designs vary between manufacturers, most modern stoves — including the Arada and Hamlet ranges we install — share the same fundamental controls.
Primary Air Control
This is usually a slider or lever at the bottom of the stove, often below the door. It controls the air that enters beneath the fire, flowing up through the grate and into the base of the fuel bed. Primary air is essential for getting the fire started and burning at high output. When the fire is established and you want to slow it down, you reduce the primary air.
Secondary Air (Airwash)
The secondary air control feeds a curtain of preheated air down the inside of the glass door. This serves two purposes: it keeps the glass clean by preventing soot from settling (the “airwash” effect), and it provides oxygen for secondary combustion — the burning of volatile gases above the flames. On most stoves, this control should remain partially or fully open at all times to maintain a clean glass and efficient burn.
Tertiary Air
Some higher-specification stoves have a tertiary air supply that introduces preheated air into the top of the firebox through small holes in the baffle plate or rear wall. This air ignites unburned gases before they enter the flue, improving efficiency and reducing emissions. Tertiary air is usually not user-adjustable — it is built into the stove’s design.
Flue Damper (If Fitted)
Older or larger stoves sometimes include a flue damper — a rotating disc inside the flue pipe that restricts the flow of gases. Opening the damper increases draw; closing it slows the fire by reducing the volume of air being pulled through. Not all stoves have one, and on many modern Ecodesign models, the internal air control system makes a damper unnecessary.
Know Your Stove
Read your stove’s manual before the first burn. Every model is slightly different, and understanding where the controls are and how they respond will make your experience significantly better from day one. If you’ve lost the manual, most manufacturers have downloadable PDFs on their website.
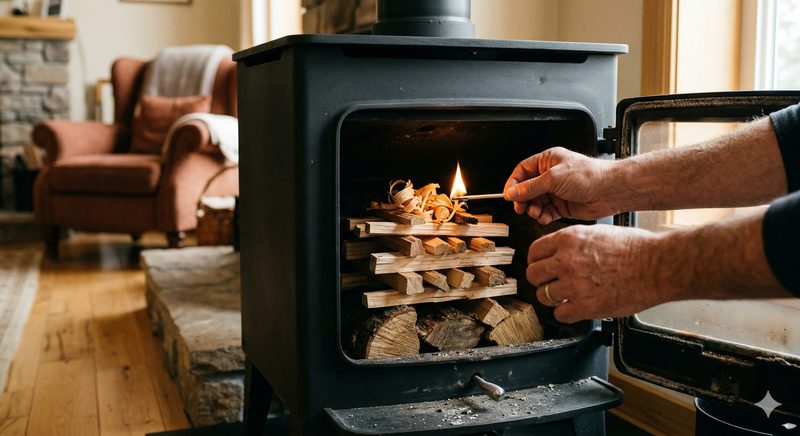
The Top-Down Lighting Method
The top-down method is the cleanest, most efficient way to light a wood burner. Unlike the traditional approach of building a fire from the bottom up, the top-down method produces less smoke during the critical start-up phase, heats the flue faster, and establishes a strong draw more quickly. It is the method recommended by HETAS and by stove manufacturers across Europe.
Step-by-Step
1 Open all air controls fully. Both primary and secondary air should be wide open. If you have a flue damper, open that too. You want maximum airflow during the lighting phase.
2 Place two or three medium-sized logs on the base of the firebox. These should be split hardwood, roughly the width of your forearm. Arrange them parallel to each other with a small gap between them. These are your “foundation” logs — they will not ignite immediately but will catch as the fire burns down to them.
3 Add a layer of smaller kindling on top of the logs. Use eight to twelve pieces of dry softwood kindling, arranged in a crosshatch pattern (alternating directions). The gaps between the kindling allow airflow.
4 Place two or three natural firelighters on top of the kindling. We recommend wax-and-wood-wool firelighters rather than chemical-based ones. Position them towards the front of the stack where they are easy to light.
5 Light the firelighters and close the door. Do not leave the door ajar — the air controls should be providing all the oxygen the fire needs. Watch through the glass as the firelighters ignite the kindling, and the kindling ignites progressively downwards through the stack.
The top-down method: firelighters on top, kindling in the middle, logs at the base.
6 Wait 15–20 minutes. Allow the fire to establish itself fully. The kindling will burn through and ignite the larger logs below. The flue will heat up and draw will strengthen. Resist the temptation to open the door and rearrange anything.
7 Reduce the primary air. Once the logs are burning with a steady, rolling flame and the flue thermometer (if you have one) reads above 200°C, begin to close down the primary air control. This slows the burn rate and moves the stove into its efficient “cruising” mode.
8 Keep the secondary air open. The airwash should remain at least partially open to maintain clean glass and support secondary combustion. On most stoves, you will find a comfortable balance where the flames are lively but not roaring, and the glass stays clear.
Refuelling
When the logs have burned down to a bed of glowing embers, it is time to add more fuel. Open the primary air fully before opening the door — this increases the draw and prevents smoke from spilling into the room. Add one or two logs, close the door, and allow the fire to re-establish before reducing the primary air again.
Never Do This
Never overload the firebox. A stove that is over-fuelled can reach dangerously high temperatures that damage internal components, stress the chimney liner, and void your warranty. One or two logs at a time is almost always sufficient.
Common Mistakes When Starting Out
- Closing the air down too soon. The fire needs at least 15 minutes with full air before you start restricting it. Closing down too early smothers the fire and produces excessive smoke.
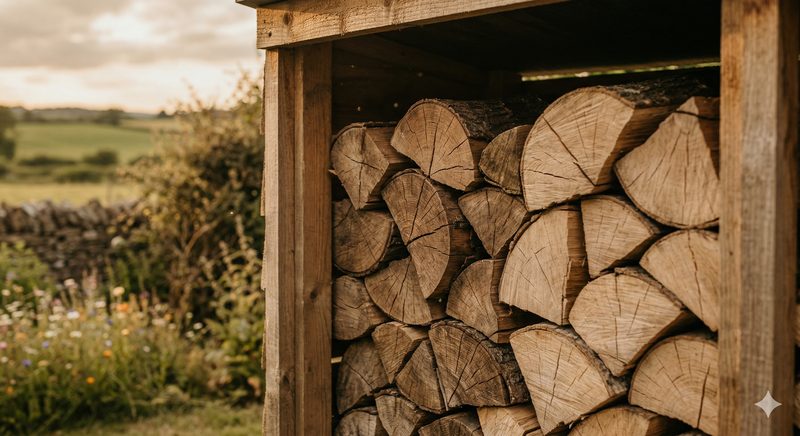
- Using wet or unseasoned wood. If the fire hisses, produces heavy white smoke, or the glass blackens within minutes, the wood is too wet. See our guide to wood seasoning.
- Opening the door too frequently. Every time you open the door, you lose heat and disrupt the combustion cycle. Let the fire do its work.
- Ignoring the flue temperature. A magnetic flue thermometer (around £10) is an invaluable tool. It tells you when the flue is too cool (below 100°C — risk of creosote) or too hot (above 350°C — risk of damage).
Overnight Burns
Some stove owners like to load up the fire before bed and close the air controls right down for a slow overnight burn. While this extends the burn time, it is not recommended for modern Ecodesign stoves. Running a stove at very low output produces incomplete combustion, excessive particulate emissions, rapid creosote build-up, and a cold flue that struggles to draw properly in the morning. It is better to let the fire burn out naturally and relight the following day.